So, you’ve decided to do some DIY painting, but you’re not sure where to start? It can be a daunting task, depending on how much work you have to do.
But don’t fret! I’ll go over some of the basics to interior painting prep work below, and hopefully that will give you a better idea of where to begin.

Removing Wallpaper
Removing wallpaper can be a very tedious task, and there are multiple ways to do it – such as using soap, special solvents, or steam to help dissolve the adhesive. You can read more about all of those methods in our blog post about how to easily remove wallpaper in a few simple steps.
There are quite a few things you should consider before you remove your wallpaper though. Some good things about painting over wallpaper are that it makes it easier and quicker for you to paint, and if you have an older home, you know your drywall or plaster underneath will remain intact. On the other end of the spectrum for why you’d want to remove it, however, is the drywall or plaster underneath could be damaged or crumbling, and that might be an issue you’d want to fix. Also, seams, textured wallpaper, and some patterns may show through, which means you’d have to use more primer or more coats of paint to hide them.
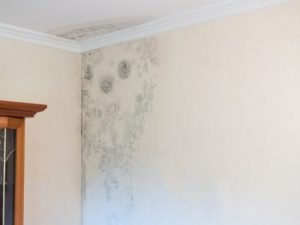
Smoke/Water Damage – Covering Stains
 Smoke and water damage can leave terrible stains behind. In some cases, you can easily clean and fix them yourself. Other times, it’s better left to the professionals – like in the case of a widespread house fire, or a leaked pipe. Stagnant water stains can be repaired easily, by cutting out the affected drywall, drying the area thoroughly, replacing any weakened or worn out studs, then placing a new drywall patch or plywood over the holes. After you’ve applied your joint compound and it’s dried and been sanded, you can prime and paint the area.
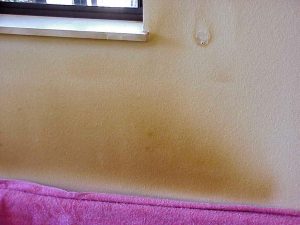 Smoke, in my opinion, seems to be a little easier to clean, depending on the severity. You just use dry cleaning sponges to clean the affected area. If you can still see stains or soot, you can use a cleaning agent, like Trisodium Phosphate (TSP) or Phosphate Free Trisodium (TSP-PF), with a regular cleaning sponge. After that, make sure to wipe the area down with warm water and a clean sponge to remove any of the cleaning residue that’s still there. Once the area is completely dry, you can use Zinsser’s Cover Stain, which is an oil-based stain-blocking primer, or Zinsser’s B-I-N Primer, which is a pigmented shellac primer that works better on stubborn stains and odors. If you decide to use the latter, keep in mind it smells terrible and can be messy to work with since it’s thin, so use a respirator. B-I-N also works well on blocking water-stains from bleeding through your finish as well.
Fixing Small Holes or Big Holes
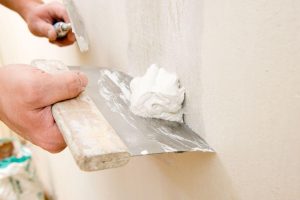
Holes and gouges are common things one might have to repair on their wall. Small holes, smaller than the size of a baseball, for example, can be easily fixed by applying a self-adhesive drywall patch. Then you apply your joint compound, sand it smooth, always applying more coats if needed; sanding between each, until it blends with the rest of the wall. For larger holes, you’d use the same procedure as mentioned above for water damage by cutting out an appropriate amount of space around the hole to make it easier to fit the drywall back into.
Drywall – Mud vs Spackling

Drywall mud, also called joint compound, was created to bond with paper drywall or gypsum boards. It is used as a finishing product to cover joints between panels or other larger jobs that require more durability. You would need to use several coats to cover blemishes, fasteners or screws thoroughly.

Spackle is used to repair holes or divots on painted or plaster walls, which makes it ideal for household use. You can apply it with a flexible putty knife, and wipe away the extra before it’s let to dry, then sanded. It comes in multiple consistencies, called grains, which vary between heavy and light. Knowing the type of job that you’re doing, will impact which grain you will need.
Skim Coating
Skim coating is a texturing technique used to make a wall smooth. You can use this technique to hide imperfect taping jobs. It gives the wall a plaster-like appearance and is best in situations when only the smoothest surface will do. You can use a mud that has the same consistency as mayonnaise, but some finishers prefer to thin it slightly with water. However, you will get some shrinkage if you mix it too wet. Skim coating works best if you make sure to only apply thin layers. It is most desirable in areas of critical lighting, such as upper parts of the walls under a skylight or a hallway with a light source that shines obliquely on the walls. It is also best if used with a gloss or semi-gloss paint because the reflective paints tend to exaggerate defects more. You do not need to apply a skim coat if you already applied another texture, such as knockdown or eggshell.
Caulking
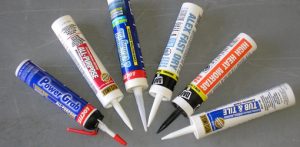 The purpose of caulking is to seal out moisture and drafts, as well as conceal cracks and gaps. There are 2 broad categories of caulks – adhesives, which bond one type of surface to another, and sealants, which seal cracks, gaps, and joints between materials to keep out moisture and drafts. Knowing what kind of project you’re completing will help you know what kind of caulk you need to choose.
Latex Caulk, also called Acrylic Latex Caulk or Painter’s Caulk, is the most common type of caulk used. It comes with a 20 – 25 year warranty, usually. Acrylic Latex Caulk Plus Silicone is good for joints where baseboards, door and window casings, and crown moldings meet the walls. The added silicone gives it more flexibility so it will last longer, though it comes with a 35 year warranty.
High-performance Sealant caulks have many different names and many different uses. You will know the difference in quality by the price differences between them. Make sure to pay attention to the label to make sure you have the right one for your project. You can look for things like waterproof, paintable, indoor/outdoor, or fast-drying. High-performance Sealants are more useful when sealing up joints on dissimilar surfaces that expand and contract at different rates, like brick to wood or metal to wood. They are a little bit more difficult to work with though, as they tend to be messier and you’ll need a paint thinner or other solvent to clean them up.
100% Silicone caulk is most commonly used in kitchens, bathrooms, and exterior doors and windows, where you’d want a waterproof, mold and mildew resistant seal. These caulks are permanently flexible. You will also need a paint thinner or other solvent to clean up after these and they are generally not paintable.
Painting Over Wood Trim
 Painting over previously unpainted wood trim is pretty simple, but it is very labor intensive and can take a long time. You will need to remove any glossy coating on the wood (i.e. polyurethane) so the primer can penetrate in to the wood and grab on to it. You can remove this using sandpaper or a liquid deglosser. Be sure to seal the room and cover your items before you start sanding, so you don’t spread dust all over everything! After sanding, you need to wipe down the trim to remove any dust and clean off any dirt. Before you paint, you will need to use a high-quality primer; we recommend using an oil-based primer as it will penetrate the best and last the longest. Since you have done so much prep work to get the wood trim ready to be painted, be sure to use the highest quality paint so it lasts.
Primers
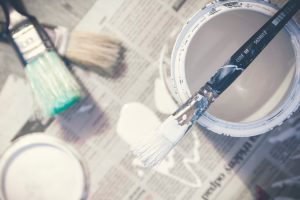 Primers are a special type of paint that goes on before the finish coat of paint. They can be used on wood, metal, drywall and concrete. They have an ideal, uniform texture, which is slightly coarse, so that paints adhere effectively to it. They seal up porous surfaces and prevent stains and previous colors from showing up underneath your paint job. It’s always good to prime over already painted surfaces so your work is as durable and long lasting as possible. And it is especially necessary if you are switching paint types or if your old paint is cracking, crumbling or has surface damage. Primers are formulated for interior, exterior, and metals, and in particular tints. Interior primers seal, increase adhesion, and create a uniform surface for walls. There are 3 basic types: oil-based, latex and pigmented shellac.
Oil-based primers work with both oil and latex paints. They are ideal for wood, steel and other metals, and surfaces with existing paint. These primers are considered good stain killers, or in other words, they prevent stains from showing through. They are good at blocking stains from ink, nicotine and water in particular. They are often slow drying and release high amounts of volatile organic compounds, or VOCs. These can be harmful to people in high concentrations with prolonged exposure. So it’s recommended you have great ventilation while working with them. You do have to use harsher thinners and solvents to clean brushes and applicators with this type of primer, and it has to disposed of carefully and properly.
Latex-based primers are water-based and ideal for prepping unfinished drywall. They’re ideal because they even out the surface of the wallboard and any joint compound applied to it. They’re more flexible, fast drying, and less brittle than oil-based primers, which means they’re less susceptible to peeling and cracking. They can also be used for softwood, like pine and cedar, brick, concrete, and galvanized metals, like steel and iron. Latex-based primers can cover stains, like smoke, lipstick, or crayon, but they are not as effective as oil-based or shellac primers.
Shellac primers work well with wood, metal, plaster and plastic, as well as with oil and latex paints. They are the most ideal for interior paint jobs, since they are fast drying and highly adhesive. Shellac primers are possibly the best at stain-blocking, which is why they are recommended to be used on severe water and smoke damage. They can even seal in the smells from smoke damage, which is pretty handy. They are excellent at preventing normal water, rust, and smoke stains. A downside to these primers is that they are not as versatile as latex or oil primers and they give off more fumes, which means more ventilation and possibly a respirator again. You also have to use denatured alcohol to thin them out if needed.
Painting can be way more work than it originally seemed to be, once you get down to it. Knowing what needs to be done, and the order they need to be done in, can really help your project go smoothly. If you have your interior painting prep work done correctly, it should be pretty simple, actually. Hopefully this post helped you plan everything out you may need to do, or informed you of some things you didn’t know you needed to do.
 Have any questions about any of these topics? Think we should’ve added something in that we didn’t? Let us know in the comments below! Or, if reading this has made you decide you’d rather have someone else complete your interior painting project for you, then click the link below or give us a call!
{